
How to make a paper Christmas village
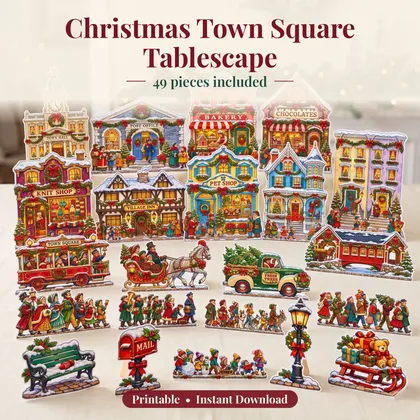
Print the houses on white cardstock, cut around their borders, and glue a folded stand behind each piece. Then arrange the houses on a mantel, shelf, or holiday table. In a Paper Villages pack, the buildings are flat pictures that stand upright. The folds go in the stand behind the building, so you can finish a house without having to line up separate walls or a roof.
Start with a building you want people to notice first. A clock tower makes a good anchor for a town square, and you can put a bakery at the end of a short row. Get that building standing before you print and cut the rest. It will show you how much room the village needs, including the space behind each piece for its stand.
Choose a pack and set aside time
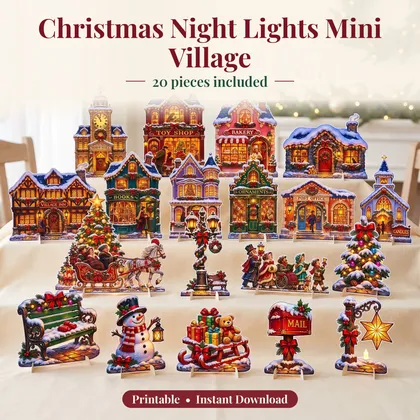
The Christmas Night Lights Mini Village has snowy blue roofs and warm yellow windows printed on the buildings. It comes with carolers and a horse-drawn sleigh, so you can make a short street with just a few pieces. The Christmas Town Square has more shops, houses, and small details for a longer display. For pastel cottages and the look of glitter on the roof, try the Vintage Putz Glitter House Village. The sparkle is part of the printed design.
Set aside an afternoon if you plan to cut and set up the full Town Square. Allow time for the glue to dry according to the package directions. If you have less time, pick a few buildings and a tree or group of carolers. You can add another row later. If you’re cutting with someone else, divide the work by shape. A house with broad sides is easier to pass to someone getting used to scissors. Save narrow details like lamp posts for someone who likes close cutting.
Gather your supplies
- A printable Christmas village pack and its Start Here PDF, which contains the stand templates and instructions.
- White cardstock. About 200 gsm is a good starting point if your printer supports it.
- A home color printer that accepts your cardstock, or a print shop that can print the PDFs at actual size.
- Ordinary printer paper for the first print, scissors, and glue suitable for paper.
- A ruler if you want to check that a tall building will clear the shelf above it.
Check the printer manual for the heaviest paper it takes and which tray to use. If your printer takes lighter cardstock, try one building and stand before you print the rest. At a print shop, show the clerk both a building page and a stand page so both print at the same scale.
Print one page at actual size
Open the Start Here file first. Use the picture index to decide what you want in your first row, and find the matching pages in the other PDFs. Pick a page with a building you plan to use. You can use the cardstock copy in the village if it prints well.
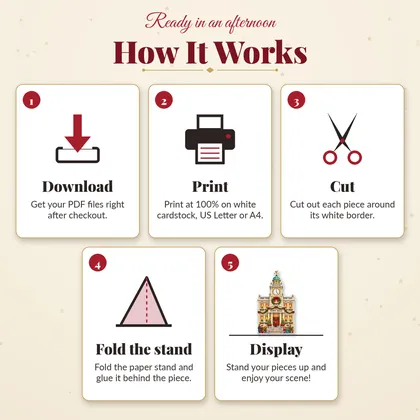
Load US Letter paper and select Letter (8.5 × 11 inches) in the print dialog. The PDFs use Letter pages, with the artwork inside an area that also fits A4. If you have A4 in the tray, select A4 as the paper size and check the preview. For either size, choose Actual Size or enter 100%. Turn off Fit to Page so the printer keeps the scale. Look at the roof and the base of the building in the preview and check that neither gets cut off.
Print the first page on ordinary paper. If an edge is missing, look at the tray size and the preview again before using cardstock. If everything fits, load the cardstock. Choose Cardstock or the matching paper type if your printer offers that setting, then print the page again. Use the same paper size and scale for the stand pages. Print the pages you need for the first section of the village. Once those pieces are standing, see how much room you have for another row.
Cut out the houses
Follow the outside of the thin border around each piece. Leave that rim in place. It gives you room to turn around a chimney or a tree branch while keeping the picture intact. When a page holds several pieces, first cut the sheet into smaller sections between them. A smaller section is easier to turn in your hand as you follow the outline.
Cut straight along the bottom edge where the building meets the table. Around a bend, turn the cardstock into the scissors and take shorter cuts. Around a tight point, cut toward the corner from one side, then finish the corner from the other. If an inside curve feels too narrow, leave a little extra white space there. You can trim it after the rest of the piece comes free.
Keep the tall buildings and little props in separate piles. That makes it easier to choose a stand and find the smallest pieces when you lay out the street.
Fold and glue a stand behind each piece
Find the stand pages in the Start Here PDF. Use the large stand for a tall building and a small stand for a small prop. Hold the flat strip behind the cutout before you glue it. The panel marked BACK should fit behind the artwork.
- Cut out the stand strip on the solid outline and keep the small glue tab attached.
- Fold on the dashed lines and press each crease flat with a finger.
- Slip the glue tab under the panel marked BACK. Glue the tab there to close the strip into a triangle.
- Glue the BACK panel to the back of the cutout. Line up the bottom of the panel with the bottom of the piece.
- Let the glue set, then stand the piece on a flat surface and check that the base rests level.
Check the first building from the side. If the bottom of the stand hangs below the edge of the cutout, line it up while the glue still lets you move it. If the base rocks, check that each fold follows the dashed line and the tab sits flat. Once the first stand sits flat, repeat the steps for the other pieces. The guide includes stand pages you can print again if you need more.
Arrange the village on a mantel or table
For a mantel, put the tallest buildings at the back. Set the shorter houses off to either side so the buildings behind them still show. Put small trees, people, and the sleigh near the front. Leave enough room for every stand to sit flat on the shelf. Take a step back and look at the display from where you normally enter the room. Move any tree or lamp post that covers a doorway or shop sign you want people to see.
For a table, put a few buildings near the middle and turn a few to face guests on the other side. Sit down to see where you need to leave room for plates, serving dishes, and conversation. The Town Square pack includes snowy ground strips. Lay a strip between two rows of buildings as a street, or use a short stretch under the sleigh. Leave an open spot in front of the shops for carolers.
If you want to add another row, look through the Christmas and winter collection for buildings and props that fit the space you have left. When the holidays are over, lift the pieces by their bases and store them in a shallow box so the stands keep their shape. Keep your PDFs handy for any pieces you want to print again next year.